CubicVR for SU Podium or SketchUp
Table of Contents
CubicVR offers a way to create SketchUp based panoramas
CubicVR is a SketchUp extensions for SU Podium V2.5/ 2.6 (and above) users. It produces six, non-photo-realistic, square images and automatically stitches the cubic images into an equirectangular image, ready to be converted to a spherical Panorama. There are several benefits for CubicVR for SU Podium users and even if you don't use SU Pdoium. CubicVR will create non-photo-realistic (NPR) SketchUp panoramas. These panoramas can be overlayed on the SU Podium photo-realistic equirectangular image in Podium Image Editor. (See example below). Also, you can create spherical panoramas of just the SketchUp scene, with applying SU Podium raytracing, for quick tests to see if the camera position and the scene's content is correct. Once the NPR equirectangular image is create, it can be uploaded to the panopdm.com Panorama server and be used as non-photo-realistic SketchUp spherical panoramas.
For SketchUp users, not using SU Podium, CubicVR can be beneficial just to create non-photo-realistic spherical panorama which can be rotated from a fixed camera position in 360 X 180 degrees.
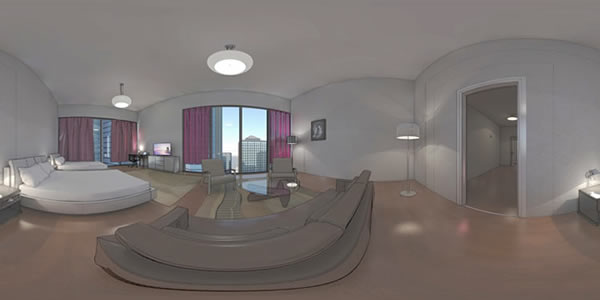
Click on the above image to view the spherical panorama with a CubicVR overlay.
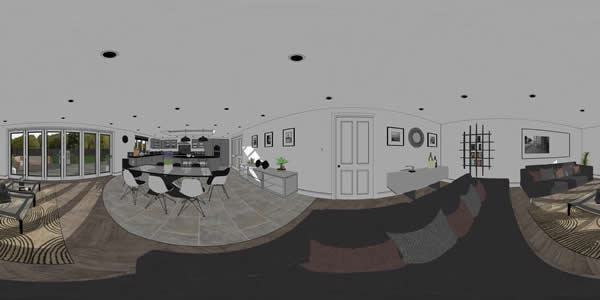
Click on the above image to view a non-photo-realistic spherical pano of a SketchUp scene..
Where is CubicVR? How do I obtain it?
- V2.5 users Cubic VR is available in the Podium Extras pull down menu.
- SU Podium V2.6 users CubicVR is avaiable in the SU Podium V2.6--->Tools pull down menu.
- SketchUp Only users. If you are a SketchUp user not using SU Podium download CubicVR from the SU Plugins Free Bonus Extensions page here. Install the CubicVR RBZ file from within SketchUp. Read here on how to install .rbz files at the bottom of the Free-Plugins page.
How to use CubicVR
When CubicVR Run button is invoked, CubicVR will create six square images and one reference image. The cubic image sizes are equal and based on the Panorama size that you key in. Some important things to keep in mind.
- By default CubicVR will only create SketchUp non-photo-realistic equirectangular images that can be converted to spherical panoramas. You can use for testing or simply for fun, or use these as overlays to enhance SU Podium photo-realistic panoramas.
- When Run button is invoked, all the cubic images will be created. It's difficult to stop this once it has started.
- The cube size will be determined by entering the width of the equirectangular (Panorama)image. If you want a NRP (non-photo-realistic) SketchUp overly panorama image, it must match the size of the photo-realistic equirectangular image you created with SU Podium V2.5.x.
- The cubic images and the stitched PanoramaOutput image will be saved to a folder of your choice in a uniquely named sub folder.
- Open the stitched Panorama in Podium Image Editor or upload directly to the Panorama Server.
- Read about using free Panopdm.com Panorama Server here.

Let's examine some of the options.
- Settings. The settings refers the image size of the final stitched equirectangular image (the panorama). When you enter the width size in the Panorama Image size box, the cube image size will automatically be updated. For example if you enter 5,000 for the pixel width, cube size image box will be updated to read 1,250. That means six rectangular images of 1250 X 1250 will be created. These will be stitched together into a 5,000 X 2,500 equirectangular image. (Keep in mind, CubicVR will ignore image sizes that are in the SU Podium Options menu.)
- View Settings. If you are using Reset Tilt from SU Podium's Tool menu, simply pick the Current Camera.
- Image format is always .jpg.
- Run will invoke CubicVR and will create six square images that have an Aspect Ratio of 1:1 and will have the width size of Cube Image Size.
How to create a line overlay panorama using CubicVR
Let's go over the steps to create a line overlay Panorama which will create an effect of sketchy line edges in a SU Podium created photo-realistic spherical Panorama. Our goal will be to create the below image.
Click on the above image to view the spherical panorama.
To follow along with this short tutorial, feel free to download the Studio Scene- Bathroom model. This is a SketchUp 2015 model and will load in SU 2015 thru SU 2018. You can download more "studio" Scene models from this page.
It is advisable to review the Podium Image Editor line overlay tutorial but ignore information about Exporting SketchUp images. CubicVR will save the SketchUp panorama image at the size you have specified in the Panorama Size box.
- First use the SU Podium normal method of rendering this model as a Panorama. Use SU Podium's Options. Select the Pano Day or Night scene. Pick Panorama from Options and image size of 4,000 X 2,000. Use the interior_high_1.0.8 preset. You should obtain an equirectangular image such as below:
- From inside either inside the Podium Extra pull down menu or SketchUp Extensions menu, open CubicVR.
- Turn off SketchUp shadows and then pick a sketchy line style. This will turn off textures.
- Choose Panorama Size of 4,000. This will automatically update the Cube Image Size to 1,000. You may need to place your cursor in the Cube Image Size box.
- Make sure you use the Podium Tool, Reset Tilt. After that pick Current Camera for View Settings.
- For simplicity sake, choose JPG for image format.
- Make sure that Podium Rendered Image is checked OFF.
- Finally, select Run.
- Select the Folder where the cubic and Panorama images will be saved.
- After a few minutes, you will see this message that CubicVR Done.

- Open Podium Image Editor (PIE) from the SU Podium, Tools menu.
- First open the photo-realistic Studio Scene - Bathroom EQ image.
- Next use the Background menu in PIE and Load an Overlay image.
- Select the PanoramaOutput.jpg from the PanoramaOutput_xxx folder you created. Adjust the Fade slider bar. Your PIE scene should look like this.
- Make sure you select Apply and save the new overlay-ed image.
- Now upload your new Panorama to the Panorama Server.


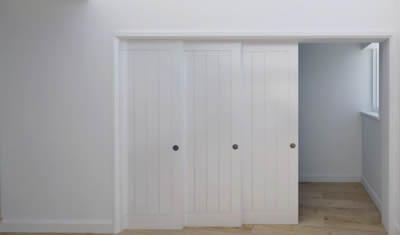
Take a look at an example created by Nat Ellis of JBA below.
 |
 |
|
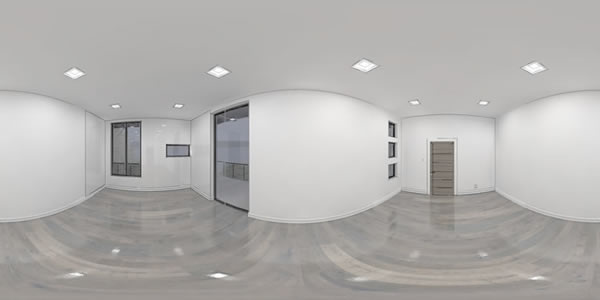
Panorama with no line overlay |
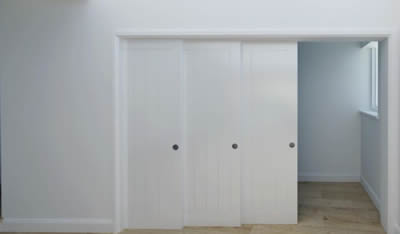
Panorama with line overlay |
The example above has very subtle line overlay effect but you can see how using the overlay highlights the details in the sliding door. In this case, Nat created the SketchUp line overlay with CubicVR at twice the resolution size as the Podium equirectangular image. And then scaled the line overlay image down to match the size of the Podium created image. This technique can give stronger line definition.